I know finding a new place for next school year should be mostly about location, quality and how much I’ll have to shell out every month to have a roof over my head. While that’s all fine and dandy, I can’t help but spend a big chunk of time planning how I’ll decorate my place, instead of how I’ll actually afford it.
[Pinterest](http://pinterest.com) is a new website that allows users to create collections of photos and links. Judging from the rising popularity of its do-it-yourself section, I’m guessing I’m not alone in my love for cheap and doable decorating. Here are some pretty, inexpensive and practical crafts I’ll be living with next year.
**Dry Erase Makeup Board**
The Pinterest version of this involved a fancy picture frame and a custom cut piece of metal. So, as a lazy, poor crafter I had to dress it down a bit. I still ended up with a pretty and simple way to store and display my makeup.
Materials: A cup big enough to put your makeup brushes in, a dry erase board, one yard of fabric, adhesive spray, some magnets, scissors, liquid glue and your hair straightener.
How-to:
1. Cut your fabric so it’s about two inches bigger than your dry erase board on all sides.
2. Lay the fabric on the board upside down. Fold the edges in until the piece fits the board’s frame and then use your straightener to make sure the crease keeps. (If you’re fancy and have an iron, you could use that, as well.)
3. Cover the whole board with adhesive spray and lay your fabric on top. This is surprisingly the hardest part, so set it down slowly and feel free to rip it off and just try again.
4. Bust out the makeup you want to put on your board. For things with a flat surface (bronzer, blush, powder) you can just spray your adhesive on the magnet and stick it on. For round pieces (mascara, eyeliner, cover-up) use liquid glue. It takes longer to dry, but the spray just won’t stick. Make sure to put multiple magnets on the heavier stuff, and don’t forget about your brush cup! Let everything sit overnight.
5. When everything’s all dry, try out your board! I had to re-glue a few pieces, so you may need to, as well. After that, hang up your board in your room, bathroom or wherever!
P.S. If you ever get tired of your magnetic makeup, the board is a cute way to leave yourself or your roommate reminders and notes.
Total $$$: around $20, retail inspiration: about $40
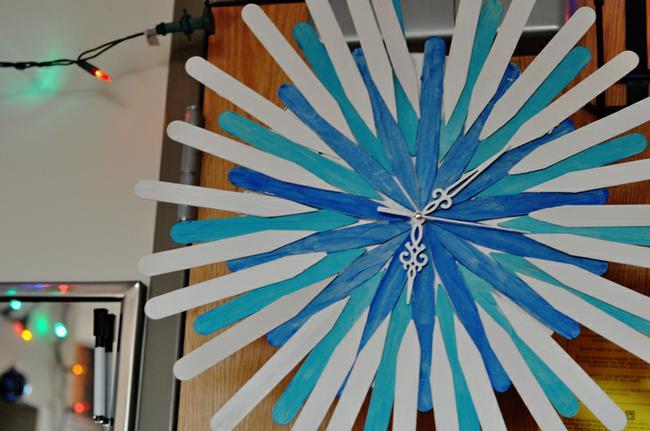
**Starburst Clock**
This is a really easy way to dress up an old flat-faced clock. I’d recommend enlisting your roommate, because who doesn’t love painting with kid’s paint?
Materials: Painting kit, a box of 60 or so craft sticks, a flat-faced clock, liquid glue and scissors.
How-to:
1. On each of your craft sticks, cut one end so it’s pointy.
2. Lay them out on your clock so you’re sure you have enough. You want the point to meet together in the middle. Then, in the spaces between the sticks, you can put another layer. Mine had three layers, but you can do as many as you want!
3. Divide your sticks into piles, going by which layer they were in. Pick your favorite colors and get painting! I went layer by layer, but you could have different colors all over if you wanted.
4. Get your liquid glue and start gluing. Fill in all the spaces you want, with however many layers you want, with whatever colors you want.
5. Let the glue dry over night. Hang your clock up! You’ll never wonder what time it is again.
Total $$$: around $15, retail inspiration: More than $100
**Fancy drawers**
This would be a simple way to dress up some basic drawers. Just cut some fabric to fit your drawers, and super glue it on.
**Crayon art**
The easiest craft to do on Pinterest, hands down. Glue some crayons to the top of a board and then melt them with a hair dryer. It’s a great pop of color, and impossible to get wrong.
Monogram
A great way to decorate yours and your roommate’s door. You could use buttons, felt, pins, or really anything small. Trace a letter, fill it in with some knick-knacks, glue in place and frame!