Crafts from Pinterest hardly ever turn out as planned. But I’ve gone through them and found the crafts that won’t suck the holiday spirit right out of you.
Walking through the dollar store, I realized it was the holiday shopping destination I’ve been missing out on for years. From stockings to stuffed elves, the dollar store has you covered, making it your primary source of supplies for these crafts.
####Picture Presents (up to $5, under a minute)
An old trick I learned from my grandparents: Transform your ordinary photo frames into Santa’s secrets.
Still have empty frames sitting around your room that you’ve been too lazy to print photos for? Or, perhaps, one’s a photo of you and your backstabbing “friend” you met the first week of school? Great! Finally put these lifeless accessories to use by decorating them in gift wrap.
*What you’ll need:*
Picture frame
Wrapping paper
Tape
Scissors
Bows or other accessories, if desired
Size your wrapping paper and cut it out just as you would when wrapping presents. Fold the sides of the paper over, pressing it down to make a crease for the stand or wall hanger. Then, cut out the shape of the crease to allow the frame to stand or hang as usual.
Wrap the frame with the hole lined up how it was originally. Be careful to not tape the actual frame. Add other bows or desired accessories, and before you know it, your room will be looking like you were so good, Santa came early this year.
After the holiday season, you’ll be lucky enough to unwrap the frames to once again to be reminded of what happened between you and your frenemy. You’re welcome.
####Sock Snowman (around $7, 15 minutes)
I don’t know about you, but the laundry machine always seems to swallow half my socks. If only there were a clever Christmas craft I could do with the survivor socks … oh wait, there is! The sock snowman was my favorite craft I made during elementary school. It’s super cute and super easy to do, even if you’re not very crafty!
*What you’ll need:*
Sock
Rice, beans or something else to fill it with
String
Buttons
Felt or fabric
Glue
Take a long sock and cut it off at the ankle. You can either then use the foot part to make the hat, or, if the end of the sock has designs on it like mine did, cut off part of the leg. The second part will be used to make a hat.
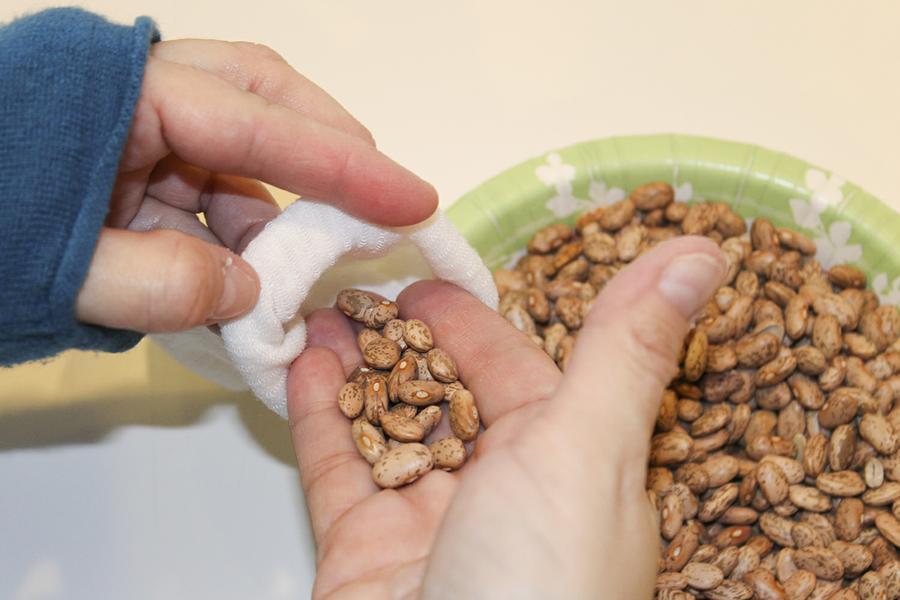
Turn the sock for the snowman inside out, and tie the very end tightly with a piece of string. Then, flip the sock back rightside out. Start filling your snowman with something of your choice. I used beans, but in doing so I realized rice would have worked much better.
Once filled, tie the top of the sock together again tightly. Section off the upper middle part of the snowman to be the head. Make the section for the head bigger than you want the head to be, because when tieing it it’ll end up smaller. Wrap string around it and tie it tightly.
Next, your stylish snowman needs some fashion accessories. Flip the hat portion of the sock inside out and tie it the same as you did for the body, then flip it back right. It also needs a scarf, obviously. Cut a long piece of fabric or felt out, and glue or sew the sides together if it’s not double sided. Lastly, glue or sew some buttons on it, tie the scarf around its neck and wola! Your snowman is complete.
The snowman can easily stick around for one than one holiday season, and could easily be a homemade gift! Just make sure it doesn’t come to life because that would be weird.
####A Cardboard Christmas (under $6, about 30 minutes)
You likely don’t have room to fit a full Christmas tree in your college bedroom, so fake it with this easy hack. While this is the most time consuming craft on this list, it’ll all be worth it when your room has the most holiday spirit in your whole residence hall.
*What you’ll need:*
Cardboard
Green paint
Yellow glitter glue
Scissors
Garland or other decorations, if desired
Draw or trace a tree onto cardboard. Make it as big or small as you want, likely depending on how much room you have for it. Cut out the tree, then trace the tree onto another piece of cardboard so it’s the same size. Cut out that part, too. Lastly, cut draw and cut out a star with leftover scraps of cardboard.
Draw two slits on the trees: one on the top half of the tree about three-fourths of the way day, the other (on the other tree piece) on the bottom part up about three-fourths of the way. This will be how your tree can stand up together.
Paint both sides of both tree parts green (or whatever color ya want), and both sides of the star with yellow glitter glue (or any kind), if desired. Once dried, put the tree together and put on the decorations you want.
####A Paint Chip off the Block (under $3, 20 minutes)
Paint chips are a good, old-fashioned way to transform any room from drab to fab. I scored some free paint chips and turned them into colorful, cutesy garland.
*What you’ll need:*
Paint chips
String
Scissors
Glue
Take the paint chips and draw on the design you want your garland to be. I chose winter bells, but consider snowmen, stars, Christmas trees, gingerbread men, etc. The possibilities are almost endless. Then, simply cut out the designs and glue them to the string. To speed up the process, layer the paint chips when you’re cutting. Once it’s dry, you’ll have garland that’s as colorful as your spirit!
####From Riot to Wreath (your dignity, a lifetime)
While most of the crafts I chose turned out, one craft was sent from the grinch: the solo cup wreath. At first glance, this looked like an easy way to repurpose party cups into holiday decorations.
Supposedly you can weave ribbon above and under solo cups, gluing it down, and it somehow creates a wreath. Instead, I spent an hour of my life attempting to create a simple craft with ribbon slipping and sliding all around the solo cups. Once one cup finally stuck to the ribbon, upon putting on the next cup the first would fall off. It was a mess.
I thought this craft’s final product would symbolize college life, but instead the craft’s production did.